Search This Blog

Tuesday, April 18, 2023

How to change download policy of repositories in Red Hat Satellite 6.3?

Tested on Red Hat Satellite 6.3


Issue

How to change the download policy of all enabled repositories in Satellite 6.3?

How to change the repository download policy to immediate in Satellite 6.3?


Raw

- Changing download policy to 'immediate'.

foreman-rake katello:change_download_policy DOWNLOAD_POLICY=immediate


- Changing download policy to 'on-demand'.

foreman-rake katello:change_download_policy DOWNLOAD_POLICY=on_demand

Sunday, June 12, 2022

Converting the Image Format Using qemu-img

You can import an image file in VHD, VMDK, QCOW2, RAW, VHDX, QCOW, VDI, QED, ZVHD, or ZVHD2 format to HUAWEI CLOUD. Image files in other formats need to be converted before being imported. The open-source tool qemu-img is provided for you to convert image file formats.

Key points

  • qemu-img supports the mutual conversion of image formats VHD, VMDK, QCOW2, RAW, VHDX, QCOW, VDI, and QED.
  • ZVHD and ZVHD2 are self-developed image file formats and cannot be identified by qemu-img. To convert image files to any of the two formats, use the qemu-img-hw tool. 
  • When you run the command to convert the format of VHD image files, use VPC to replace VHD. Otherwise, qemu-img cannot identify the image format.

I'm using Fedora35 and I've already installed the package

$ sudo dnf provides qemu-img
Last metadata expiration check: 0:53:05 ago on Sun 12 Jun 2022 09:49:21 PM CDT.
qemu-img-2:6.1.0-5.fc35.x86_64 : QEMU command line tool for manipulating disk images
Repo        : fedora
Matched from:
Provide    : qemu-img = 2:6.1.0-5.fc35

qemu-img-2:6.1.0-14.fc35.x86_64 : QEMU command line tool for manipulating disk images
Repo        : @System
Matched from:
Provide    : qemu-img = 2:6.1.0-14.fc35

qemu-img-2:6.1.0-14.fc35.x86_64 : QEMU command line tool for manipulating disk images
Repo        : updates
Matched from:
Provide    : qemu-img = 2:6.1.0-14.fc35

Checking package version.

$ qemu-img -V
qemu-img version 6.1.0 (qemu-6.1.0-14.fc35)
Copyright (c) 2003-2021 Fabrice Bellard and the QEMU Project developers

Converting the image.

$ export VMDK='wiki.vmdk'
$ export QCOW2='wiki.qcow2'
$ qemu-img convert -p -f vmdk -O qcow2 ${VMDK} ${QCOW2}
    (100.00/100%)

Getting the image information.

$ qemu-img info ${QCOW2}
image: wiki.qcow2
file format: qcow2
virtual size: 30 GiB (32212254720 bytes)
disk size: 15.8 GiB
cluster_size: 65536
Format specific information:
    compat: 1.1
    compression type: zlib
    lazy refcounts: false
    refcount bits: 16
    corrupt: false
    extended l2: false

And now enjoy, you can continue customizing the image or directing using it on QEMU.

Thursday, October 14, 2021

Resetting a Windows guest’s Administrator password with guestfish

DISCLAIMER: This is not my post is only a copy; in case the original gets deleted or whatever, posting on my personal blog gets more accessible for me to find it. You can find the original one in this link at the end of the post. 

I recently found myself with a Windows guest for which I didn’t have the Administrator password or any way of getting it. Nevertheless, I needed to make configuration changes to it. As I had no need to recover the old password, I was looking for a way to simply replace the Administrator password with one of my choices. 

I came across this excellent post on the topic at 4sysops.com. Option 4, the Sticky Keys trick, worked for me and is exceptionally simple to do with guestfish in Fedora. Windows has a feature called Sticky Keys, part of its suite of accessibility features. As such, it’s available before login and critical to this method. In short, pressing a specific sequence of keys will invoke the Sticky Keys program. 

We will use Guestfish to temporarily replace that program with a command shell, use the command shell to change the Administrator password, log in, and then put everything back how it was. N.B. As pointed out in the above post, Windows uses your password to encrypt various bits of data, including the Windows Vault and passwords stored in IE. Changing the Administrator password using this mechanism will make that data permanently inaccessible. 

First, we assume we have local access to the disk image from our Fedora box and that libguestfs is installed. Also, note that this is an offline process, so the guest must be shut down at this point. Attempting to do this while the guest runs will result in data corruption.

# guestfish -i guest.img
Welcome to guestfish, the libguestfs filesystem interactive shell for editing virtual machine filesystems.
Type: 'help' for a list of commands 'man' to read the manual 'quit' to quit the shell
> mv /Windows/System32/sethc.exe /Windows/System32/sethc.exe.bak
> cp /Windows/System32/cmd.exe /Windows/System32/sethc.exe
> exit

You may find that the capitalization of the paths is different in your guest, but Guestfish’s tab completion should help you sort this out quite quickly. Start your guest again. When the login screen appears, press the SHIFT key 5 times. Instead of Sticky Keys, a command shell will be displayed:


The original post for Windows 2008 here

Thursday, April 22, 2021

Can't initialize iptables table filter and nat: Permission denied

The best solution will be to change the container image to have an updated iptables version, but in case you can't do that, follow the next steps.

Environment

  • Red Hat OpenShift Container Platform 4.6+

Issue

Executing iptables command in an application container fails with the following error.


[root@pod]# iptables -L iptables v1.8.4 (legacy): can't initialize iptables table `filter': Permission denied Perhaps iptables or your kernel needs to be upgraded.

[root@pod]# iptables -L -t nat iptables v1.8.4 (legacy): can't initialize iptables table `nat': Permission denied Perhaps iptables or your kernel needs to be upgraded.

Resolution

Add the needed capabilities and match the SELinux denied context on audit logs on pod.spec.containers[0].securityContext.

spec: containers: securityContext: privileged: false capabilities: drop: ["all"] add: ["NET_ADMIN", "NET_RAW", "NET_BIND_SERVICE"] seLinuxOptions: user: "system_u" role: "system_r" type: "container_t" level: "s0:c981,c991"

Diagnostic Steps

  1. Find the worker node from where the pod is running.
  2. Connect to the worker node.
  3. Tail audit log.
  4. Initialize a bash session on the pod.
  5. Execute iptables command.
  6. Wait for iptables denial error on audit log.

[root@worker] # tail -f /var/logs/audit/audit.log ...[ SNIP ]... type=AVC msg=audit(1618591176.860:2303): avc: denied { module_request } for pid=912615 comm="iptables" kmod="iptable_filter" scontext=system_u:system_r:container_t:s0:c981,c991 tcontext=system_u:system_r:kernel_t:s0 tclass=system permissive=0 type=AVC msg=audit(1618591176.860:2304): avc: denied { module_request } for pid=912615 comm="iptables" kmod="iptable_filter" scontext=system_u:system_r:container_t:s0:c981,c991 tcontext=system_u:system_r:kernel_t:s0 tclass=system permissive=0 ...[ SNIP ]...

Monday, June 29, 2020

TripleO Container steps

Container steps

Similar to bare metal, containers are brought up in a stepwise manner. The current architecture supports bringing up baremetal services alongside containers. Therefore, baremetal steps may be required depending on the service and they are always executed before the corresponding container step.

The list below represents the correlation between the baremetal and the container steps. These steps are executed sequentially:

  • Containers config files generated per hiera settings.

  • Host Prep

  • Load Balancer configuration baremetal

    • Step 1 external steps (execute Ansible on Undercloud)

    • Step 1 deployment steps (Ansible)

    • Common Deployment steps

      • Step 1 baremetal (Puppet)

      • Step 1 containers

  • Core Services (Database/Rabbit/NTP/etc.)

    • Step 2 external steps (execute Ansible on Undercloud)

    • Step 2 deployment steps (Ansible)

    • Common Deployment steps

      • Step 2 baremetal (Puppet)

      • Step 2 containers

  • Early Openstack Service setup (Ringbuilder, etc.)

    • Step 3 external steps (execute Ansible on Undercloud)

    • Step 3 deployment steps (Ansible)

    • Common Deployment steps

      • Step 3 baremetal (Puppet)

      • Step 3 containers

  • General OpenStack Services

    • Step 4 external steps (execute Ansible on Undercloud)

    • Step 4 deployment steps (Ansible)

    • Common Deployment steps

      • Step 4 baremetal (Puppet)

      • Step 4 containers (Keystone initialization occurs here)

  • Service activation (Pacemaker)

    • Step 5 external steps (execute Ansible on Undercloud)

    • Step 5 deployment steps (Ansible)

    • Common Deployment steps

      • Step 5 baremetal (Puppet)

      • Step 5 containers

Sunday, June 28, 2020

View the list of images on the undercloud docker-distribution registry

To view the list of images on the undercloud docker-distribution registry use the following command:

(undercloud) $ curl http://192.168.24.1:8787/v2/_catalog | jq .repositories[]

To view a list of tags for a specific image, use the skopeo command:

(undercloud) $ curl -s http://192.168.24.1:8787/v2/rhosp13/openstack-keystone/tags/list | jq .tags

To verify a tagged image, use the skopeo command:

(undercloud) $ skopeo inspect --tls-verify=false docker://192.168.24.1:8787/rhosp13/openstack-keystone:13.0-44

Saturday, June 27, 2020

Updating network configuration on the Overcloud after a deployment

By default, subsequent change(s) made to network configuration templates (bonding options, mtu, bond type, etc) are not applied on existing nodes when the overcloud stack is updated.

To push an updated network configuration add UPDATE to the list of actions set in the NetworkDeploymentActions parameter. (The default is ['CREATE'], to enable network configuration on stack update it must be changed to: ['CREATE','UPDATE'].)

  • Enable update of the network configuration for all roles by adding the following to parameter_defaults in an environment file:

    parameter_defaults:
    NetworkDeploymentActions: ['CREATE','UPDATE']
  • Limit the network configuration update to nodes of a specific role by using a role-specific parameter, i.e: {role.name}NetworkDeploymentActions. For example to update the network configuration on the nodes in the Compute role, add the following to parameter_defaults in an environment file:

    parameter_defaults:
    ComputeNetworkDeploymentActions: ['CREATE','UPDATE']

Friday, June 26, 2020

OSD refusing to start with "ERROR: osd init failed: (1) Operation not permitted"

The main issue is: OSD refuses to start with "ERROR: osd init failed: (1) Operation not permitted"

Log error:

2014-11-13 02:32:32.380964 7f977fd87780 1 journal _open /var/lib/ceph/osd/ceph-289/journal fd 21: 10736369664 bytes, block size 4096 bytes, directio = 1, aio = 1
2014-11-13 02:32:32.393814 7f977fd87780 1 journal _open /var/lib/ceph/osd/ceph-289/journal fd 21: 10736369664 bytes, block size 4096 bytes, directio = 1, aio = 1
2014-11-13 02:32:42.105930 7f977fd87780 1 journal close /var/lib/ceph/osd/ceph-289/journal
2014-11-13 02:32:42.112233 7f977fd87780 -1 ** ERROR: osd init failed: (1) Operation not permitted

Resolution:

  • It appears the OSD is having trouble authenticating with the monitor.
  • Verify the keyring file is present and correct?
  • By default, it is located in /var/lib/ceph/osd/ceph-/keyring.
  • It should match the key returned from the command

# ceph auth get osd.

Thursday, November 21, 2019

Get IPMI IP address from OS

 First check that you have ipmitool installed:

[root@lykan ~]# yum provides ipmitool Last metadata expiration check: 0:06:54 ago on Thu 21 Nov 2019 10:39:22 PM CST. ipmitool-1.8.18-10.fc29.x86_64 : Utility for IPMI control Repo : fedora Matched from: Provide : ipmitool = 1.8.18-10.fc29

Discover:

[root@lykan ~]# ipmitool lan print | grep "IP Address" IP Address Source : Static Address IP Address : 10.10.4.5

The complete information provided:

[root@lykan ~]# ipmitool lan print Set in Progress : Set Complete Auth Type Support : NONE MD2 MD5 PASSWORD Auth Type Enable : Callback : : User : : Operator : : Admin : : OEM : IP Address Source : Static Address IP Address : 10.10.4.5 Subnet Mask : 255.255.255.0 MAC Address : xx:xx:xx:xx:xx:xx SNMP Community String : public IP Header : TTL=0x40 Flags=0x00 Precedence=0x00 TOS=0x10 BMC ARP Control : ARP Responses Disabled, Gratuitous ARP Disabled Gratituous ARP Intrvl : 2.0 seconds Default Gateway IP : 10.10.4.254 Default Gateway MAC : 00:00:00:00:00:00 Backup Gateway IP : 0.0.0.0 Backup Gateway MAC : 00:00:00:00:00:00 802.1q VLAN ID : Disabled 802.1q VLAN Priority : 0 RMCP+ Cipher Suites : 0,1,2,3,4,5,6,7,8,9,10,11,12,13,14,128 Cipher Suite Priv Max : XXXaaaXXaaaXaaa : X=Cipher Suite Unused : c=CALLBACK : u=USER : o=OPERATOR : a=ADMIN : O=OEM Bad Password Threshold : Not Available

Tuesday, October 1, 2019

Improve user experience using QEMU/KVM with Windows guest

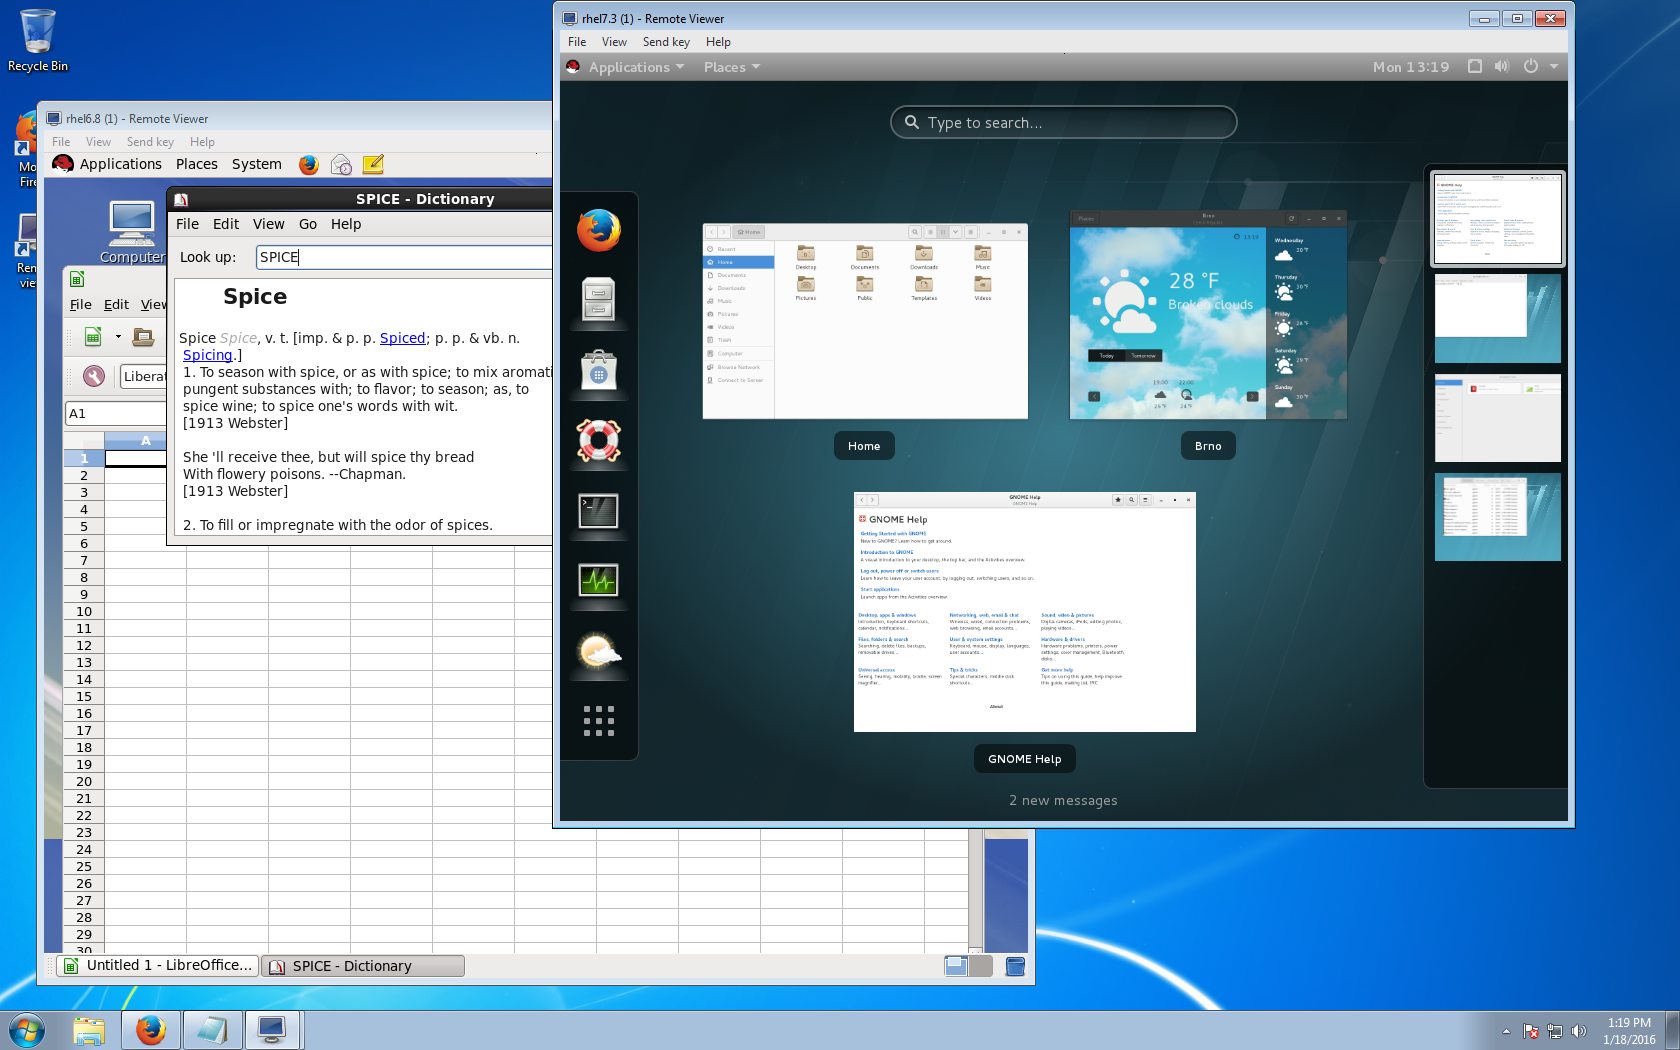
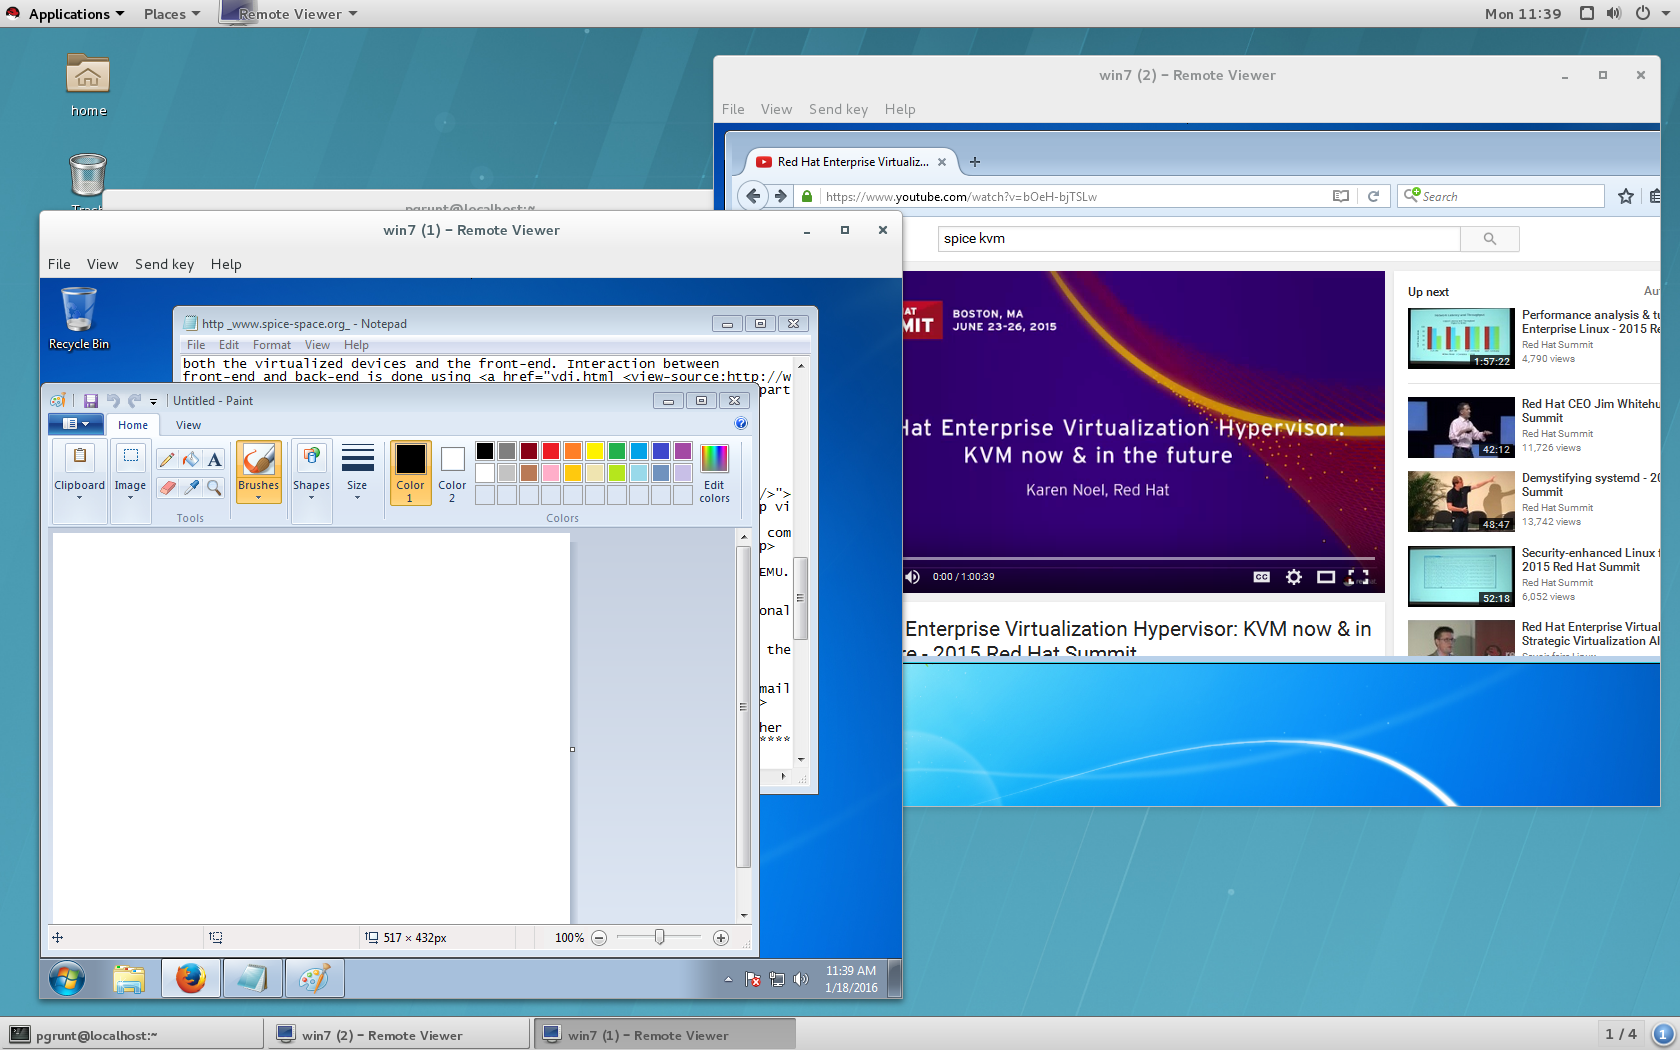
A lot of sysadmins, SRE o wherever you want to call us, using native Linux in our laptops have the need to use virtual machines running Windows (some support, pentesting tasks, etc), if you are passionate about running periodic updates by now you figure out the main problem of this, if not, you will; the main problem is that on every kernel upgrade, you will lose the modules of VMware or VirtualBox, the best solution for this is to use QEMU/KVM, the K is for kernel so the support is embedded in the kernel, with this you will never lose support on your virtual machines, but there is a catch, even if you install virtIO drivers you will face issues like the screen does not resize, copy and paste from host to guest does not work, and is very sad to work that way.

So the solution: The SPICE project aims to provide a complete open-source solution for remote access to virtual machines in a seamless way so you can play videos, record audio, share USB devices, and share folders without complications.


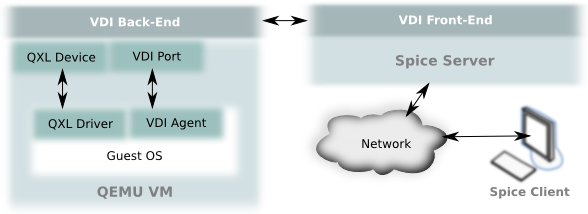
SPICE could be divided into 4 different components: Protocol, Client, Server, and Guest. The protocol is the specification in the communication of the three other components; A client such as a remote viewer is responsible to send data and translate the data from the Virtual Machine (VM) so you can interact with it; The SPICE server is the library used by the hypervisor in order to share the VM under SPICE protocol; And finally, the Guest side is all the software that must be running in the VM in order to make SPICE fully functional, such as the QXL driver and SPICE VDAgent.


Just put in your virtual machine a channel spice and install the driver, the latest version could be found here.

Thursday, May 23, 2019

fake_pxe as pm_type in RHOSP13 (TripleO + OpenStack Queens)

So, in RHOSP13 fake_pxe is being deprecated to change in RHOSP14 for manual management, the problem is that is just in between the migration, so there is no a clean way to use fake_pxe in RHOSP13. Another change is in the installation of undercloud, the option enabled_drivers is now DEPRECATED and changed by enabled_hardware_types. What now, in order to be able to use fake_pxe as a pm_type first install the undercloud without the options enabled_drivers, only use enabled_hardware_types, and add at the end manual-management, like this:

... #enabled_drivers=pxe_drac,pxe_ilo,pxe_ipmitool enabled_hardware_types=redfish,ipmi,idrac,ilo,manual-management ...

After that just install the undercloud using the common way.

[stack@director01 ~]$ openstack undercloud install ... ############################################################################# Undercloud install complete. The file containing this installation's passwords is at /home/stack/undercloud-passwords.conf. There is also a stackrc file at /home/stack/stackrc. These files are needed to interact with the OpenStack services, and should be secured. ############################################################################# [stack@director01 ~]$

Next, change manually the ironic.conf file located in /etc/ironic/ironic.conf to enable the DEPRECATED option enabled_drivers and add fake as a new driver.

enabled_drivers=pxe_drac,pxe_ilo,pxe_ipmitool,fake enabled_hardware_types=redfish,ipmi,idrac,ilo,manual-management

And restart ironic-conductor service:

(undercloud) [stack@director01 ~]$ sudo systemctl restart openstack-ironic-conductor

check the drivers:

(undercloud) [stack@director01 ]$ openstack baremetal driver list +---------------------+------------------------+ | Supported driver(s) | Active host(s) | +---------------------+------------------------+ | idrac | director01 | | ilo | director01 | | ipmi | director01 | | manual-management | director01 | | pxe_drac | director01 | | pxe_ilo | director01 | | pxe_ipmitool | director01 | | redfish | director01 | +---------------------+------------------------+

Now can we add a instackenv.json file.

(undercloud) [stack@director01 ~]$ cat instackenv-controller01.json { "nodes":[ { "mac":["controller1_mac"], "name":"nuc-controller01", "arch":"x86_64", "capabilities":"profile:control,node:controller-0,boot_option:local", "pm_type":"fake" } ] }

If you don't do this or try to use manual-management pm_type at this moment you will get an error similar to this one:

(undercloud) [stack@director01 ~]$ openstack overcloud node import ~/instackenv-controller01.json Started Mistral Workflow tripleo.baremetal.v1.register_or_update. Execution ID: 6ce7871c-d9d0-448e-9b46-78ced387fa48 Waiting for messages on queue 'tripleo' with no timeout. No valid host was found. Reason: No conductor service registered which supports driver fake. (HTTP 400) Exception registering nodes: No valid host was found. Reason: No conductor service registered which supports driver fake. (HTTP 400)

Import the new node definition to ironic and run introspection:

(undercloud) [stack@director01 ~]$ openstack overcloud node import ~/instackenv-compute01.json Started Mistral Workflow tripleo.baremetal.v1.register_or_update. Execution ID: 434cfe01-740d-4d58-b504-6f291ab12823 Waiting for messages on queue 'tripleo' with no timeout. 1 node(s) successfully moved to the "manageable" state. Successfully registered node UUID 62ce7d2c-03ae-4c6e-8c4a-13e817f26fa3 (undercloud) [stack@director01 ~]$ (undercloud) [stack@director01 ~]$ openstack baremetal introspection start --wait nuc-controller01 Waiting for introspection to finish... +------------------+-------+ | UUID | Error | +------------------+-------+ | nuc-controller01 | None | +------------------+-------+

But as I said, the fake driver is not going to be supported in RHOSP14 so version 13, is in the middle of the migration and we can introspect the node using fake driver, but we are not going to be able to install it, if we tried so, we will get an error like this one:

(undercloud) [stack@director01 ~]$ openstack action execution output show a637a01a-5f66-48a0-9e25-96700240c17e { "result": "Invalid node data: unknown pm_type (ironic driver to use): manual" }

So in order to solve this we need to change the driver type directly in the database, first, find the password in ironic.conf file

(undercloud) [stack@director01 ~]$ grep mysql /etc/ironic/ironic.conf #mysql_engine = InnoDB connection=mysql+pymysql://ironic:38315b04050cd6ad074ae75855f7c4367299b61a@192.168.10.9/ironic # set this to no value. Example: mysql_sql_mode= (string #mysql_sql_mode = TRADITIONAL #mysql_enable_ndb = false

Then look for the drivers configured.

MariaDB [ironic]> select name,driver from nodes; +------------------+--------+ | name | driver | +------------------+--------+ | nuc-controller01 | fake | | nuc-compute01 | fake | | nuc-compute02 | fake | +------------------+--------+ 3 rows in set (0.00 sec) MariaDB [ironic]> update nodes set driver = "manual-management" where name = "nuc-controller01"; Query OK, 1 row affected (0.01 sec) Rows matched: 1 Changed: 1 Warnings: 0 MariaDB [ironic]> update nodes set driver = "manual-management" where name = "nuc-compute01"; Query OK, 1 row affected (0.01 sec) Rows matched: 1 Changed: 1 Warnings: 0 MariaDB [ironic]> update nodes set driver = "manual-management" where name = "nuc-compute02"; Query OK, 1 row affected (0.01 sec) Rows matched: 1 Changed: 1 Warnings: 0 MariaDB [ironic]> select name,driver from nodes; +------------------+--------+ | name | driver | +------------------+--------+ | nuc-controller01 | manual-management | | nuc-compute01 | manual-management | | nuc-compute02 | manual-management | +------------------+--------+ 1 rows in set (0.00 sec)

After all this you can now safely continue with the common installation process, just remember when performing Overcloud deployment, check the node status with the ironic node-list command. Wait until the node status changes from deploying to deploy wait-callback and then manually power the nodes.

Tuesday, May 21, 2019

How to Boot into Single User Mode in CentOS/RHEL 7

DISCLAIMER: This is not my post is only a copy, in case the original gets deleted or whatever, posting on my personal blog gets easier for me to find it. You can find the original one at this link https://vpsie.com/knowledge-base/boot-single-user-mode-centos-rhel-vpsie/

The first thing to do is to open Terminal and log in to your CentOS 7 server.

After, restarting your server wait for the GRUB boot menu to show.

The next step is to select your Kernel version and press

e

key to edit the first boot option. Find the kernel line (starts with “linux16“), then change the

ro

to

rw init=/sysroot/bin/sh .

When you have finished, press

Ctrl-X

or

F10

to boot into single-user mode

After mounting the root filesystem using the following command:

chroot /sysroot/

Now, to finish this process reboot your server using the following command:

reboot -f

Wednesday, April 17, 2019

XFS online resize

 You're working on an XFS filesystem, in this case, you need to use xfs_growfs instead of resize2fs. Two commands are needed to perform this task :

# growpart /dev/sda 1

growpart is used to expand the sda1 partition to the whole sda disk.

# xfs_growfs -d /dev/sda1

xfs_growfs is used to resize and apply the changes.

# df -h

Friday, April 5, 2019

Convert string <-> int64 using golang #go-nuts

I believe that if you are going to work with timestamps is better to do it in epoch stamps, so in GO epoch is type int64.

package main

import (
    "fmt"
    "time"
    "strconv"
)

func main() {

    now := time.Now()
    nanos := now.UnixNano()
    bufferTimestamp := strconv.FormatInt(nanos, 10)

    fmt.Printf("bufferTimestamp value: %s\n", bufferTimestamp)
    timestamp, err := strconv.ParseInt(string(bufferTimestamp), 10, 64)
    if err != nil {
        fmt.Printf("Error: %d of type %T\n", timestamp, timestamp)
        panic(err)
    } else {
        fmt.Printf("Converted value: %d\n", timestamp)
    }
}

By running this you will have an output like this.

$ go run test/convert_stringtoint64.go 
bufferTimestamp value 1556951794912716618 of type string
Converted value 1556951794912716618 of type int64

Wednesday, December 12, 2018

How to disable Cloud-Init in a EL-like Cloud Image

So this one is pretty simple. However, I found a lot of misinformation along the way, so I figured that I would jot the proper (and most simple) process here.

Symptoms: an RHEL (or variant) VM that takes a very long time to boot. On the VM console, you can see the following output while the VM boot process is stalled and waiting for a timeout. Note that the message below has nothing to do with cloud-init, but it's the output that I have most often seen on the console while waiting for a VM to boot.

[106.325574} random: crng init done

Note that I have run into this issue in both OpenStack (when booting from external provider networks) and in KVM.

Upon initial boot of the VM, run the command below.

13:18:01 alvaro@lykan /home/alvaro/Documents/2post
$ sudo dnf install libguestfs libguestfs-tools openssl
Last metadata expiration check: 1:53:31 ago on Mon 16 Jul 2018 01:51:05 PM CDT.
Package libguestfs-1:1.38.2-1.fc27.x86_64 is already installed, skipping.
Package libguestfs-tools-1:1.38.2-1.fc27.noarch is already installed, skipping.
Package openssl-1:1.1.0h-3.fc27.x86_64 is already installed, skipping.
Dependencies resolved.
Nothing to do.
Complete!

13:18:26 alvaro@lykan /home/alvaro/Documents/2post
$ guestfish --rw -a ../../Downloads/CentOS-7-x86_64-GenericCloud-1805.qcow2
Welcome to guestfish, the guest filesystem shell for
editing virtual machine filesystems and disk images.

Type: ‘help’ for help on commands
‘man’ to read the manual
‘quit’ to quit the shell

> run
100% ⟦▒▒▒▒▒▒▒▒▒▒▒▒▒▒▒▒▒▒▒▒▒▒▒▒▒▒▒▒▒▒▒▒▒▒▒▒▒▒▒▒▒▒⟧ 00:00
> list-filesystems
/dev/sda1: xfs
> mount /dev/sda1 /
> touch /etc/cloud/cloud-init.disabled
> quit

Seriously, that’s it. No need to disable or remove cloud-init services.

Monday, July 16, 2018

Change password to users on qcow2 disk or images

Sometimes you need to change the password to a user in a qcow2 image, to test locally, or if you are using an infrastructure without cloud-init, regardless of the user the procedure is the same.

Depending on the system the packages name could change a little, I'm using Fedora 27 I have installed

[alvaro@lykan 2post]$ sudo dnf install libguestfs libguestfs-tools openssl
Last metadata expiration check: 1:53:31 ago on Mon 16 Jul 2018 01:51:05 PM CDT.
Package libguestfs-1:1.38.2-1.fc27.x86_64 is already installed, skipping.
Package libguestfs-tools-1:1.38.2-1.fc27.noarch is already installed, skipping.
Package openssl-1:1.1.0h-3.fc27.x86_64 is already installed, skipping.
Dependencies resolved.
Nothing to do.
Complete!


Obviously, I have a QEMU environment to test and run the images, a very important part just to know that your steps are working.

[alvaro@lykan 2post]$ guestfish --rw -a ../../Downloads/CentOS-7-x86_64-GenericCloud-1805.qcow2

Welcome to guestfish, the guest filesystem shell for
editing virtual machine filesystems and disk images.

Type: ‘help’ for help on commands
‘man’ to read the manual
‘quit’ to quit the shell

><.fs> run
100% ⟦▒▒▒▒▒▒▒▒▒▒▒▒▒▒▒▒▒▒▒▒▒▒▒▒▒▒▒▒▒▒▒▒▒▒▒▒▒▒▒▒▒▒⟧ 00:00
><.fs> list-filesystems
/dev/sda1: xfs
><.fs> mount /dev/sda1 /
><.fs> cp /etc/shadow /etc/shadow-original
><.fs> vi /etc/shadow


Inside the vim editor, you will see the file and now you can change the hash of any user (do not close this until you reached the last step), in any other terminal run:

[alvaro@lykan 2post]$ openssl passwd -1 mysuperpassword
$1$GKdzYMMe$q20PpMv5i/QFbmgwOqtZy1


Copy that generated hash and copy inside the first and second colon punctuation symbol (delete every inside this)


Before

root:!!:17687:0:99999:7:::
bin:*:17632:0:99999:7:::
daemon:*:17632:0:99999:7:::
adm:*:17632:0:99999:7:::
lp:*:17632:0:99999:7:::
sync:*:17632:0:99999:7:::
shutdown:*:17632:0:99999:7:::
halt:*:17632:0:99999:7:::
mail:*:17632:0:99999:7:::
operator:*:17632:0:99999:7:::
games:*:17632:0:99999:7:::
ftp:*:17632:0:99999:7:::
nobody:*:17632:0:99999:7:::
systemd-network:!!:17687::::::
dbus:!!:17687::::::
polkitd:!!:17687::::::
rpc:!!:17687:0:99999:7:::
rpcuser:!!:17687::::::
nfsnobody:!!:17687::::::
sshd:!!:17687::::::
postfix:!!:17687::::::
chrony:!!:17687::::::


After

root:$1$GKdzYMMe$q20PpMv5i/QFbmgwOqtZy1:17687:0:99999:7:::
bin:*:17632:0:99999:7:::
daemon:*:17632:0:99999:7:::
adm:*:17632:0:99999:7:::
lp:*:17632:0:99999:7:::
sync:*:17632:0:99999:7:::
shutdown:*:17632:0:99999:7:::
halt:*:17632:0:99999:7:::
mail:*:17632:0:99999:7:::
operator:*:17632:0:99999:7:::
games:*:17632:0:99999:7:::
ftp:*:17632:0:99999:7:::
nobody:*:17632:0:99999:7:::
systemd-network:!!:17687::::::
dbus:!!:17687::::::
polkitd:!!:17687::::::
rpc:!!:17687:0:99999:7:::
rpcuser:!!:17687::::::
nfsnobody:!!:17687::::::
sshd:!!:17687::::::
postfix:!!:17687::::::
chrony:!!:17687::::::


Close the vim editor, save the changes, and exit guestfish

><.fs> quit

[alvaro@lykan 2post]$


Now you can test the image on any cloud environment or using your local QEMU environment.

Wednesday, December 6, 2017

Get total provisioned size from cinder volumes

A quick way to get the total amount of provisioned space from cinder

alvaro@skyline.local: ~
$ cinder list --all-tenants
mysql like output :)

So to parse the output and add all the values in the Size col, use the next piped commands.

alvaro@skyline.local: ~
$ . admin-openrc.sh

alvaro@skyline.local: ~
$ cinder list --all-tenants | awk -F'|' '{print $6}' | sed 's/ //g' | grep -v -e '^$' | awk '{s+=$1} END {printf "%.0f", s}'
13453

The final result is in GB.

Wednesday, June 14, 2017

Ceph recovery backfilling affecting production instances

In any kind of distributed system, you will have to choose between consistency, availability, and partitioning, the CAP theorem states that in the presence of a network partition, one has to choose between consistency and availability, by default (default configurations) CEPH provides consistency and partitioning, just take in count that CEPH has many config options: ~860 in hammer, ~1100 in jewel, check this out, is jewel github config_opts.h file.

If you want any specific behavior in your cluster depends on your ability to configure and/or to change on the fly in case of contingency, this post talks about specific default recovery / backfilling option clusters, maybe you have noticed that in case of a critical failure, like losing a complete node, this causes a lot of movement of data, lots of ops on the drives, by default the cluster is going to try to recover in the fastest way possible, and also needs to support the normal operation and common use, like I said at the beginning of the post, by default CEPH have consistency and partitioning, so the common response is to start to have failures in the availability and users will start to notice high latency, high CPU usage in instances using RBD backend because of the slow response.


Try to think of this in a better way and let's analyze the problem, if we have a replica 3 cluster and we have a server down (even if we have a 3 servers cluster), the operation is still possible and the recovery jobs are no that important because CEPH will try to achieve consistency all the time, it will achieve the correct 3 replica consistency eventually, so everything will be fine, no data loss, the remaining replicas will start to regenerate the missing replica in others nodes, the big problem is the backfilling will compromise the operation, so the real problem is that we need to choose between a quick recovery or a common response to the clients and watchers connected, the response is not that hard to know, operation response is priority number 0!!!!


Lost and recovery action in CRUSH (Image from Samuel Just, Vault 2015)

This is not the non-plus ultra solution, is just my solution to this problem, all this was tested in a CEPH hammer cluster:

1.- The better one is to configure at the beginning of the installation in the ceph.conf file

******* SNIP *******
[osd]
....
osd max backfills = 1
osd recovery threads = 1
osd recovery op priority = 1
osd client op priority = 63
osd recovery max active = 1
osd snap trim sleep = 0.1
....
******* SNIP *******

2.- If not, you can inject the on-the-fly options, you can use osd.x where x is the number of the osd daemon, or like the next example applies cluster-wide, but remember to put in the config file after because these options will be lost on reboot.

ceph@stor01:~$ sudo ceph tell osd.* injectargs '--osd-max-backfills 1'
ceph@stor01:~$ sudo ceph tell osd.* injectargs '--osd-recovery-threads 1'
ceph@stor01:~$ sudo ceph tell osd.* injectargs '--osd-recovery-op-priority 1'
ceph@stor01:~$ sudo ceph tell osd.* injectargs '--osd-client-op-priority 63'
ceph@stor01:~$ sudo ceph tell osd.* injectargs '--osd-recovery-max-active 1'
ceph@stor01:~$ sudo ceph tell osd.* injectargs '--osd-snap-trim-sleep 0.1'

The final result will be a really slow recovery of the cluster, but operation without any kind of problem.

Wednesday, April 12, 2017

Keeping up to date git forked repos

A quick guide to remembering how to keep up-to-date forked repos:

First: Manage a set of tracked repositories.

alvaro@skyline.local: ~/docker-openstack-cli
$ git remote -v

origin https://github.com/alsotoes/docker-openstack-cli.git (fetch)
origin https://github.com/alsotoes/docker-openstack-cli.git (push)

Second: Add the remote repo to work with.

alvaro@skyline.local: ~/docker-openstack-cli
$ git remote add kionetworks https://github.com/kionetworks/docker-openstack-cli.git

Third: Print repo local configuration.

alvaro@skyline.local: ~/docker-openstack-cli
$ git remote -v

kionetworks https://github.com/kionetworks/docker-openstack-cli.git (fetch)
kionetworks https://github.com/kionetworks/docker-openstack-cli.git (push)
origin https://github.com/alsotoes/docker-openstack-cli.git (fetch)
origin https://github.com/alsotoes/docker-openstack-cli.git (push)

Fourth: Push to the remote repo, to complete the update.

alvaro@skyline.local: ~/docker-openstack-cli
$ git push kionetworks

Counting objects: 3, done.
Delta compression using up to 2 threads.
Compressing objects: 100% (3/3), done.
Writing objects: 100% (3/3), 311 bytes | 0 bytes/s, done.
Total 3 (delta 2), reused 0 (delta 0)
remote: Resolving deltas: 100% (2/2), completed with 2 local objects.
To https://github.com/kionetworks/docker-openstack-cli.git
51bb74b..33e5dce master -> master
alvaro@skyline.local: ~/docker-openstack-cli
hist:600 jobs:0 $

Pull new changes from origin.

alvaro@skyline.local: ~/docker-openstack-cli
$ git pull

Already up-to-date.

Pull new changes from a remote called kionetworks.

alvaro@skyline.local: ~/docker-openstack-cli
$ git pull kionetworks master

From https://github.com/kionetworks/docker-openstack-cli
* branch master -> FETCH_HEAD
Already up-to-date.

Sorry if this post has too little information, is just a remember.

Wednesday, November 16, 2016

Solve Ceph Clock Skew error

Monitors can be severely affected by significant clock skews across the monitor nodes. This usually translates into weird behavior with no obvious cause. To avoid such issues, you should run a clock synchronization tool on your monitor nodes by default the monitors will allow clocks to drift up to 0.05 seconds.

This error can be seen using:

# ceph -s
# ceph health detail

root@ceph01:~# ceph -s
cluster 9227547b-bb6b-44f7-b877-3f6d25b942a4
health HEALTH_WARN
clock skew detected on mon.ceph01
monmap e3: 3 mons at {ceph01=172.18.3.5:6789/0,ceph02=172.18.5.6:6789/0,ceph03=172.18.5.7:6789/0}
election epoch 24, quorum 0,1,2 ceph01,ceph02,ceph03
mdsmap e17: 1/1/1 up {0=ceph01=up:active}
osdmap e245: 22 osds: 22 up, 22 in
pgmap v14727: 1408 pgs, 5 pools, 11977 MB data, 3183 objects
24729 MB used, 16361 GB / 16385 GB avail
1408 active+clean

The solution? just re-sync the clock in the affected mon, and restart the mon daemon.

root@ceph01:~# service ntp stop
* Stopping NTP server ntpd
root@ceph01:~# ntpdate ntp.ubuntu.com
16 Nov 01:24:16 ntpdate[4149434]: adjust time server 91.189.91.157 offset -0.002235 sec
root@ceph01:~# ntpd -gq
ntpd: time slew +0.003482s
root@ceph01:~# service ntp start
* Starting NTP server ntpd
root@ceph01:~# restart ceph-mon-all
ceph-mon-all start/running

Just to be sure, sometimes it will be better if you sync the clock on all Mon

Also, this default parameter (0.05 seconds) can be changed in the ceph config file, but that you can doesn't mean that you should, the default value is a perfect configuration.

root@ceph01:~# cat /etc/ceph/ceph.conf
....

[mon]
mon clock drift allowed = 10

...

Check again the cluster status, sometimes it takes a few seconds, like 30 seconds.

root@ceph01:~# ceph -s
cluster 9227547b-bb6b-44f7-b877-3f6d25b942a4
health HEALTH_OK
monmap e3: 3 mons at {ceph01=172.18.3.5:6789/0,ceph02=172.18.5.6:6789/0,ceph03=172.18.5.7:6789/0}
election epoch 24, quorum 0,1,2 ceph01,ceph02,ceph03
mdsmap e17: 1/1/1 up {0=ceph01=up:active}
osdmap e245: 22 osds: 22 up, 22 in
pgmap v14727: 1408 pgs, 5 pools, 11977 MB data, 3183 objects
24729 MB used, 16361 GB / 16385 GB avail
1408 active+clean